Menu

Bread is one of the most eaten forms of food in the whole world and Banana bread is one of the most famous varieties. Banana bread as the word implies, has bananas in it. It is usually moist, sweet, and has a cake-like texture. It is considered a quick bread because it is easy and fast to prepare, just combine all the ingredients, mix them, and "Viola!" it is ready to be baked. No one really knows where the banana bread originated or who invented it, but people speculate that it was created in the 18th century by housewives who were trying out the different uses of pearlash. During the 1960s when home baking was revived, banana bread suddenly became very popular. 


Banana Bread Gluten Free


Gluten-free bread recipe taste different from regular bread recipes because of the taste of the flours used to make them. When preparing gluten-free bread recipes, make sure you check the packaging of every ingredient to ensure that they are all gluten-free. Especially for people who are allergic to gluten. Here's a delicious for gluten-free banana bread recipe with lemon drizzle, which tastes the same as regular bread.

Here's all the ingredients you will need to make this delicious recipe:

Ingredients:

  • 2 cups of rice flour, or a mix of 1 cup of rice flour with 1 cup of buckwheat flour
  • 1 large tablespoon of freshly squeezed lemon juice
  • 4 tablespoons of icing sugar to make the lemon drizzle
  • 1 cup of unsalted butter or margarine
  • 3 tablespoons of baking soda
  • 4 large eggs
  • 1 ¼ cups of sugar
  • 2 tablespoons of unsalted butter (this is separate from the butter used for the bread)
  • 3 large bananas
  • ½ teaspoon of salt

preparation:

- The first step is to preheat the oven to 350°F. This will save you time later.
- Mash the bananas (you can use a blender) and set aside.
- In a deep bowl, beat the butter and sugar together to get a fluffy mix.
- Add the mashed bananas to the fluffy mix and blend.
- Break the eggs in, one by one, and fold well after each addition.
- In a separate bowl, mix the rice flour, baking powder, and salt.
- Add this to the prepared banana and egg mix.
- Mix well and check for any lumps. Lumps in the loaf will lead to the bread being cooked unevenly.
- Grease a bread loaf tin with butter. Coat evenly on all sides.
- Dust a fine layer of rice flour on the butter to prevent the bread mix from sticking to the tin. -This will also give the bread loaf a crusty outer covering.
- Pour the bread mix in the loaf tin and spread evenly.
- Let the bread bake in the preheated oven for about 1-1½ hours or until the top of the bread is firm to touch.
- Take the bread out of the oven and let it cool for 10 minutes.
- Mix the icing sugar with the freshly squeezed lemon juice to make the lemon drizzle.
- Drizzle over the top of the bread loaf and let the bread cool completely.
- Gently remove the bread from the tin and cut in slices to serve.
- This bread can be stored in an airtight container for up to 2 weeks.

You will need to bake this cake for about 50 minutes, but do not forget to keep an eye on it! Always check if you can poke the center with a toothpick or knife and if nothing sticks to it, then you are all set!
That's all it takes to make a delicious Gluten-free banana bread recipe to share with your friends and family. These simple recipes for bread are great for Celiac's (gluten intolerance).


0


Wonderful White Chocolate Cheesecake Recipe - Hidden White Chocolate Cheesecake

White Chocolate Cheesecake


This white chocolate cheesecake is a great blend between a plain cheesecake and a chocolate cheesecake. It is not too rich but sweet enough to keep you interested. This is another recipe that my grandma taught me to make as we worked together in her kitchen. Every time I make this recipe.
This cheesecake, similar to many of the others, is great for easy entertaining, extravagant parties, or everyday enjoyment. It presents itself beautifully! Like most cheesecakes, it takes a while to make but the result will be well worth the wait. With this recipe, it's a lot of fun to experiment with different sauces to drizzle over the top of the cake, although my favorite has always been chocolate.
If your family is anything like mine, this white chocolate cheesecake will only last a couple of days because it is so delicious; lucky for you it can serve up to 20 people!
This Hidden White Chocolate Cheesecake is not only delicious but is super easy to make and only takes about 20 minutes of prep time. This easy delight is sure to both please and make your dessert the hit of any get-together and will have your friends and family clamoring around asking how you had the time to such a scrumptious dessert.
YIELD: 20 slices

Ingredients:

1/2 cup butter
2 cups vanilla wafers, crushed
1 oz. white chocolate, grated
1/2 cup sugar; divided
5- 8 oz. cream cheese
3 tablespoons crème de cassis
1/8 teaspoon salt
4 large eggs and 2 large egg yolks
4 oz. white chocolate, and shaved
2 cups sour cream
1 teaspoon almond extract

preparation:

Crust:
Melt butter in a saucepan on low heat, add wafer crumbs, white chocolate, and 1/4 cup sugar. Blend well. Press on two sides and bottom of 9-inch springform pan.
Filling:
Combine cream cheese and ¼ cup sugar and beat with mixer until soft. Add crème de Cassis and salt and continue beating. Add eggs slowly, one at a time, on low speed. Do not overbeat. Fold in white chocolate. Pour mixture into prepared pan and bake at 350° for 60 minutes or until lightly browned and firm in the middle. Let stand for 10 minutes.
Topping:
Combine sour cream, sugar, and almond extract and blend until smooth. Spread over top of the cake and bake 10 minutes more at 350°.
Traditionally, cheesecakes are served cold so go ahead and put your new white chocolate cheesecake into the refrigerator. Chill for at least four hours before serving.
Once the chilling time has passed, be sure to remove the cheesecake from the fridge and let it sit on the counter for about ten minutes prior to slicing. It just makes it a little easier to slice if it is not so cold.
I know you can hardly wait, so go ahead, choose your prettiest plate, and cut that first perfect slice. Then take the time to sit down, put up your feet, and enjoy a little taste of heaven on earth as you sink your teeth into the scrumptious Wonderful White Chocolate Cheesecake Recipe. Yummy!

0

 How To Make A Perfect Pavlova Easy?


 Pavlova Cake Recipe

It is said in 1935, Herbert Sachse, chef at the Hotel Esplanade in Perth, created this popular dessert to honor the visit of Russian ballerina, Anna Pavlova.

Meringues can be tricky, so it is important to start with clean, dry utensils. If the meringue cracks, fill in cracks with extra whipping cream.


for me, it is the perfect dessert. A pavlova is heavenly any time of the year, but especially welcome in summer when there's an abundance of soft fruit about.
Yet considering pavlova is made from just a few ingredients, it's surprisingly easy to get wrong. Common complaints range from being too dry or not dry enough, or the sugar leaks out or beads on top.
So if your idea of the perfect meringue is a crisp, chewy outer casing with a soft, fluffy marshmallowy middle, just follow these simple rules and get fantastic results that work like a dream every time.
THE RULES:
1. Think SLOW & LOW (cook slowly at a low temperature)
2. Weigh the egg whites and use an equal quantity of sugar.
3. Whisk the egg whites until they form soft peaks. For best results use a mixer or handheld electric whisk and add the sugar a tablespoon at a time with the motor running.
4. Now add a sprinkling of cornflour and lemon juice or white wine vinegar (normally a teaspoon of each is all you need.)
5. Continue whisking until the meringue is glossy and resembles shaving foam.
6. Cook the meringue in a low oven. It's ready when the outside forms a crust and it peels away easily from the paper. Leave to cool down in the oven until cold.
7. Top with softly whipped cream and fruit. Strawberries and raspberries are always popular (and frozen berries work well if fresh aren't in season.) Thinly sliced kiwi fruit tastes as good as it looks or for something more exotic try mango and passion fruit.
I guarantee once you discover just how foolproof this recipe is, you'll be churning out pavlova's like there's no tomorrow.

Pavlova Cake Dessert Recipe

Serves 6 Personnes

Ingredients:

4 egg whites (weigh them first)
Now add some weight of caster sugar
1 tbsp icing sugar
1 tsp cornflour
1 tsp lemon juice or white wine vinegar
1 tsp vanilla extract (optional)
300ml double cream
350g soft fruits
Equipment:
  •  Electric mixer
  • Greaseproof paper
  • Spatula
  • Tablespoon & teaspoon

preparation:

Preheat oven to the lowest setting. 100C/200F/ Gas ¼
Whisk the egg whites until they form soft peaks. Now add the caster sugar a tablespoon at a time, whilst you continue to whisk.
Now add a teaspoon each of cornflour, lemon juice, vanilla extract (if using) followed by the sieved icing sugar and continue whisking until the mixture is glossy white and resembles shaving foam.
Dab a blob of meringue onto each corner of the baking sheet, lay a sheet of greaseproof paper on top, pressing the corners into the meringue blobs to secure the paper and prevent it from moving about.
Spoon the meringue mixture onto the greaseproof paper and mound it into a circular shape about 20 cm in diameter, piling up the meringue mixture until it's approximately 5cm high.
Place on the bottom oven shelf and leave to bake slowly for 2½ -3 hours. The meringue is cooked when it forms a crust on the outside and can be easily peeled away from the greaseproof paper.
At this point, turn out the oven and leave the meringue inside to cool and dry out - preferably overnight.
When you're ready to serve whip the cream to soft peaks and spread with a spatula over the meringue. Scatter the berries over the top and serve.
0


 The Perfect Michelada Drink Recipe

best beer for michelada


Perhaps this weekend you're setting aside the French toast or pancakes and indulging in Huevos Rancheros or Chiliquiles in honor of Cinco de Maya. Or perhaps as spring sets in and the wind blow a little warmer you're envisioning yourself somewhere beachside? Either way, you might want to reconsider your brunch drink of choice and try a Michelada. You might have heard of them before, but do you really know what one is?
South of the border some would consider it to be superior to the Bloody Mary, while still being a true variation. Micheladas are, traditionally speaking, beer, tomato or Clamato juice, with hot sauce, lime, and salt. Like in a bloody Mary the tomato juice serves as the mixer, truly blending well with the carbonation of the beer, the acid of the lime, and the brine of the salt. Not to mention, tomatoes naturally lend themselves kindly to the introduction of the heat of any kind making it not just a beer cocktail, but one that is balanced by all the basic elements: sour, spicy and savory.
Some believe the name Michelada comes from the Mexican slang phrase, "Mi chela helada" which translates to "my cold beer." Regardless of the name's origin it can be rest assured that, should you venture to our southern neighbor, you will see Micheladas beneath most beachside cabanas and in the hands of locals. Different parts of Mexico will prepare the drink differently, each region having their own version of the classic. Some places specifically serve Chaladas, which omit the tomato juice. Some will just be salt and lime. Make sure you ask how your specific bar prepares the drink when you place your order.
Like the Bloody Mary, and the Red Eye (consisting of beer, tomato juice, and an egg,) the Michelada is known for lessening the symptoms of a hangover. Though it may not be a proven fact, you will be hard-pressed to find someone that does not believe in its hair-of-the-dog-like abilities. Despite its morning rescues, the Michelada makes appearances all day long when you're visiting Mexico, as it is just as delicious in the afternoon with a good torta, or in the evening with a good mole.
Beer producers have begun recently to distribute beers containing all the ingredients for a michelada included. The problem is that this limits the specific beer you can choose for your michelada, as only a few manufacturers actually produce these beers. I prefer to make my micheladas with my favorite beer.

  1. Michelada Recipe


Ingredients:

1- 12oz beer (any Mexican beer of choice)
2- Dashes Soy Sauce
2- Dashes of Worcestershire Sauce
2- Dashes of Tabasco
1- Tablespoon Chili Powder
2- Key Limes Juiced
1- Cup of Clamato Juice (optional)
Salt
Ice

preparation:

In order to make a michelada, first salt the rim of your glass. Wet the rim or run a lime around it. Then dip it in salt.
Fill with ice and pour in tomato or Clamato juice. You can adjust the amount preferred to taste. Add your spices including celery salt, pepper and onion powder to taste. Finish your michelada by adding Worcestershire sauce, hot sauce, and lime juice and stir gently.
Another great option is to try a fresh, ready-made. These take the guesswork out of figuring out ideal ratios of ingredients and cut the time required to create a michelada. All you do is mix with beer and enjoy it.
Pour your favorite beer over the mixture or michelada mix. Stir your michelada lightly. Put a sliced lime on the rim if you would like, or put in a little extra over the top. Now sit back and enjoy your cool, refreshing Michelada!!
To make the ideal, refreshing michelada every time, try a bottle of Moreneau's Michelada Mix. It is by far my favorite.  Moreneau's is unlike any other michelada mixes because it has tomato juice in the mix for a much richer flavor. Instead of wasting time estimating the right amounts of each ingredient, you just add your favorite beer and enjoy your michelada.
0


baked flounder recipe: Japanese Oven Baked Flounder fish

baked flounder recipe


Prep Time: 20 min
Cooking flounder Time: 30 min

Ingredients:

* 4 flounder fillets
* 1 tablespoon low-fat margarine
* 2 tablespoons sake
* 2 tablespoons light soy sauce
* 2 tablespoons fresh lime juice
* 2 teaspoons minced fresh ginger
* 2 teaspoons sesame oil
* 1 teaspoon honey
* 1 teaspoon lightly toasted black sesame seeds
* 6 ounces shiitake mushrooms, stemmed and thinly sliced
* 4 leeks, green tops only, cut into 1-inch pieces
* 1 large carrot, peeled and cut into 2-inch long matchstick strips
* 1/2 large red pepper, seeded and cut into thin strips
* Steamed rice, accompaniment
* Sauteed Shiitake Mushrooms

Sauteed Shiitake Mushrooms Recipe:

* 2 tablespoons olive oil
* 3/4 cup sliced shiitake mushrooms
* 1 tablespoon sesame oil
* 2 tablespoons light soy sauce
* 2 tablespoon sake
* 4 lemons, zested and juiced

preparation:

Preheat the oven to 375 degrees. Cut 4 large squares of heavy aluminum foil large enough to hold 1 flounder fillet and one-quarter of the vegetables. Lightly put margerine one side of each and set on a work surface.
Lay the fish flat in a baking dish. In a bowl, whisk together the sake, light soy sauce, lime juice, ginger, sesame oil, honey, and black sesame seeds. Pour over the fish and let marinate for up to 45 minutes. Arrange 1 fish fillet on each sheet of aluminum foil and top with one-quarter of the shiitake mushrooms, leeks, carrots, red peppers, and marinade. Wrap tightly and place on a baking sheet. Bake until the fish is cooked through and the vegetables are tender 20 minutes. Remove from the oven and unwrap each package. Transfer the fish and vegetables to 4 large plates and top with the cooking juices. Serve with Sauteed Shiitakes and hot steamed rice.
Sauteed Shiitake Mushrooms:
Place a saute pan over medium-high heat. Add the olive oil and heat. When the oil is hot, add the mushrooms and saute until they begin to give up their liquid, about 5 minutes. Add the sesame oil, light soy sauce, sake, and lemon juice and zest and cook for 3 minutes.

0


It is a daunting task to make an authentic paella using traditional and intimidating ingredients. The dish originated in Valencia, Spain. It is made and served by the Spanish people at home as a weekly communal lunch for their family and friends. There are some important things that you should know about making authentic paella.


Paella, pronounced pa-eh-ya, is a testament to the wonderful flavors of Spanish cuisine. It is a complete and well-balanced meal in itself: a mixture of rice, meat, vegetables and/or seafood depending on which paella recipe you're following. Traditional paella recipes use mainly chicken, pork, rabbit, or snails but because of Valencia's coastal location, the seafood paella version has increasingly become the more popular, and it is usually this that tourists and people not local to the region know. Its brilliant yellow-orange hue comes from the saffron used to season the dish.
In the olden days, paella was cooked over a wood fire, a method still preferred by purists and traditionalists to this day. Given the difficulty of making, manning, and cooking over a wood fire, however, you can now make a great paella using a charcoal grill if you want to embark on a semblance of the authentic paella experience. In addition, paella pans have thin bases, so they are not recommended for burners. But if you're determined to have a go at paella-making, a regular gas burner with settings for a really low fire will do.
Paella is the name of a large pan and a Spanish dish. It is a rich dish and is prepared in the eponymous pan. The special pan is used for making the dish to give one of a kind texture to the dish. In a real Spanish paella, the liquid is absorbed completely when the rice is al dente. You can use different ingredients for making paella such as traditional rabbits and snails with a variety of seafood. The three most important ingredients used for making the dish are:
• Saffron
• Paprika
• Tomato

What do you need for making Paella?

You will need the following:

• Paella: It is a large, shallow, two-handled pan that ensures even cooking. The pan has a thin bottom, which means it heats up quickly. The pan has a large surface area so that the cooking liquid evaporates easily to get the desired texture.
• A fire: You will need a source of heat. It should be wide enough to accommodate the large pan.

Ingredients:

• Rice: The most important ingredient used for making paella is rice. Take short or medium-grain rice. Short grain rice can absorb the water quickly.
• Sofrito: It is used to give the flavor base to the paella. It contains green or red peppers, olive oil, garlic, and tomatoes.
• Herbs and spices: Saffron is used to adding color and flavor to the dish.
Pimenton: It is smoked sweet Spanish paprika.
Rosemary: It is used to give traditional flavor to the dish. It is used since snails were used in Valencian paella. The snails were fed rosemary many days before being cooked.
• Stock or broth: You can use chicken stock for making meat-based paellas and fish stock for seafood paella.
• Seafood: You can use mussels, shrimp, prawns, lobster, crayfish, and other popular seafood available in the market.
• Meat: Traditionally rabbits, chicken, and snails are the most popular and traditional paella meats, but pork and Spanish chorizo have also become popular.
• Vegetables: Traditional paella consists of three types of local beans- string beans, lima bean, and white bean. You can also add artichoke. You can add all types of vegetables.

preparation:

Prepare the ingredients ahead of time. Soak the white lima beans overnight and drain before cooking. To give a unique golden color to your dish, soak the saffron threads in the stock for 5 minutes before cooking.
Start a fire in the charcoal grill if that's what you're using. When white ash has covered the coals, you can put the paella pan on. For regular gas burners, turn the heat on high. Splash in enough olive oil to cover the bottom of the pan and heat. Saute the garlic and onion until translucent but not browned. Add seafood in, stirring constantly to prevent from sticking to the pan.

When the seafood has turned a light brown, put the green beans and lima beans in and mix together. Halve the ingredients in the pan and add the tomatoes and paprika in the middle, frying until they look a bit pasty. Pour in the rice, making sure to coat the bottom of the pan evenly. When adding the stock to your paella, it should be hot. Keep the temperature consistent when cooking. Heat the stock on low heat.
Stir and mix the rice, sofrito base, and stock for a few minutes before leaving it to settle. It will form a nice crust on the bottom called socrat . Allow the paella to simmer until the rice is cooked. If the paella looks dry, pour in more stock until all of the stock has been absorbed by the rice.
Take the paella off the fire and cover with foil. Let it stand for 10 minutes, then garnish with lemon wedges. Paella is best served when warm, not piping hot and in the pan. Dig in with wooden spoons and a glass of wine to enjoy a true Spanish meal!

0

Italian food is a popular cuisine across the world, and as a country with its coastline sticking out into a few different seas and with thousands of miles of coastline, it's unsurprising that the country has produced some fantastic seafood recipes. In this article, we're going to go over a couple of delicious fish recipes to feed your family in style - Italian style.

When picking your fish, here's a couple of hints to pick the freshest and tastiest of fishes. Start by examining the eye, avoiding them if they're cloudy. The gills should be bright red, and the flesh should be elastic and springy. Without wanting to sound too contradictory, it shouldn't smell too much of fish!


Italian Fish With Capers

Ingredients:


Any type of fish
3.5 ounces of butter
1 tbsp of flour
Olive oil
Salt
Vinegar
Capers


preparation:

You can use whichever fish is to your taste for this recipe - I would recommend a good piece of salmon, personally. Heat up a little oil in a pan, cooking the fish while you heat 3.5 ounces of butter in a saucepan. Join the butter, flour, and salt, stirring to mix together. Keep heating on a medium flame, but don't bring the mixture to the boil. Now you'll add vinegar and the capers - as many as you like, I would go for a few tablespoons per fish - to the sauce, which is then poured over the top of the fish before serving. Add a side salad or some vegetables of your choice, perhaps green beans or broccoli when dishing up.


Italian Cod with Garlic


Ingredients:


Large cod fillet
8 cloves of garlic
5 cooked potatoes
2 cups of olive oil
2 tbsp. of vinegar
1 lemon
Salt and pepper

This recipe is designed per pair, if you have more diners, simply increase the ingredients. Start off by peeling the potatoes and then boiling the potatoes to soften them, then mash them vigorously until you've made a smooth creamy mash. Meanwhile, take the garlic cloves and crush and dice them, getting rid of the skin.


preparation:

Mix the potatoes and garlic together and pour the oil gradually while mixing with a spoon. Then add the vinegar, lemon, salt, and pepper and keep mixing until you've got a dense cream. Then pour this on top of the cod, and serve up. You can add some other ingredients such as a side salad, or top off with watercress.


0

The most basic sushi recipe is not only easy but it is also fun and quick to make. It consists of raw fish like tuna or salmon, sushi rice, seaweed, and wasabi. Even though many restaurants pride themselves on making the best sushi or having the best sushi chefs, it should not deter you from making sushi at home. In making your own sushi, you will save money, have fun and add another craft to your list of accomplishments.


How to Make Your Own Sushi Easy


Ingredients:

2 cups of white sushi rice
Seaweed
¼ lb. raw bluefin tuna, salmon or any saltwater fish
Wasabi
Soy Sauce
Seaweed (optional)
Pickled Ginger (optional)
Things you need for sushi rice:
½ cup white rice vinegar
¼ cup of sugar
2 teaspoons of salt
Konbu Seaweed (as much as desired)
2 large boiling pots
Strainer
Water
Measuring cup

preparation:

Begin with preparing the sushi rice. Take the two cups of rice and pour it into a strainer. Run water over the rice and rinse thoroughly. After rinsing the rice, take the rice and place it into one large boiling pot. Fill the pot with the strained rice and water. The water should completely cover the rice. Soak the rice for at least 20 minutes. After 20 minutes elapses, drain the water from the pot. Place the rice back into the strainer. Rinse the pot. Run cold water over the strainer again to rinse the rice thoroughly until the water runs clear. Next, place the rice back into the same boiling pot. Take 2 ¼ cups of cold water and put the water into the pot with the rice. Heat the water and rice to a boil. Once boiling begins, reduce heat to simmer and cover the pot for 20 minutes.

While the rice is cooking, take the ½ cup of white rice vinegar, ¼ cup of sugar, and two teaspoons of salt and place into a separate boiling pot. Let the sugar and salt dissolve in the white rice vinegar first. Place the seaweed into the pot. Heat the components on medium heat for at least two minutes or until seaweed is tender. After the components are ready, remove from heat and set aside.

After the rice has cooked for 20 minutes, there should be little to no water in the pot with the rice. Remove from heat and let cool for 20 minutes. Once cooled, remove the rice from the boiling pot and place it inside a large bowl. Remove the seaweed from the sugar, sale, and vinegar mixture and set aside. Take the sugar, salt, and vinegar mixture and pour over the rice. Thoroughly mix all the components together thoroughly with a large spoon. Now you can begin to assemble the sushi.

Now that the rice is ready, you can begin cutting the fish. Most traditional sushi recipes call for saltwater fish like salmon or tuna. Whole, raw bluefin tuna is best suited for this recipe. Take the tuna and slice thin slices. The slices should be no larger than two inches long and ¼ of an inch in thickness. Slice all the tuna you need and put the remaining tuna in a freezer.

Take the wasabi and place a small amount into the center of the tuna slice. You can also add a small strip of seaweed on top of the wasabi. However, this is optional.

Next, take one small spoonful of sushi rice and fill the tuna with the rice. Shape the rice and tuna so that the rice does not fall apart. Don't be afraid to press the rice into the tuna. You can also wrap the tuna slice around the rice if you'd like.

Prepare all the tuna with rice, wasabi, and seaweed until you are finished with every piece of tuna. Garnish with soy sauce or pickled ginger to your liking. You may also eat the remaining rice as a side dish. Enjoy.


Important sushi health considerations:


Remember, always keep your fish frozen or on ice while not in use. Fish that remain in room temperature or humid conditions is more susceptible to parasites, bacteria, and viruses. Also, sushi should be consumed in moderation. Due to its high mercury content, it is not ideal to eat sushi daily. Consume in moderation for the best health benefits.


0

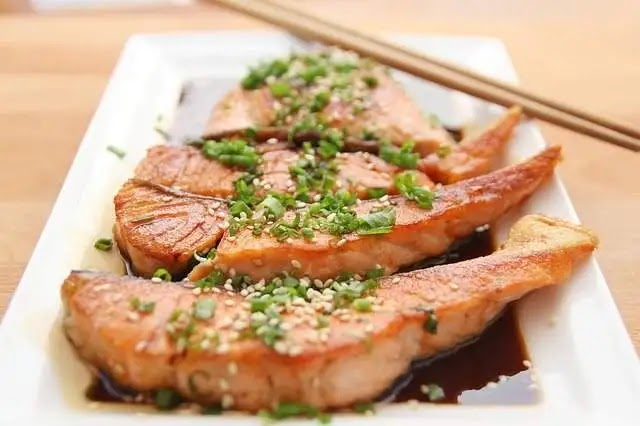
Salmon is a tasty and versatile meat that can be prepared in a wide variety of ways. Those looking to remain totally heart-smart can enjoy baked salmon with steamed vegetables and rice and a delicious and healthy meal, but salmon can also satisfy those craving something a little worse for the heart and good for the soul. Fried salmon is a wonderful dish that is hearty, satisfying, and tasty. Fried salmon can be added to a salad, pasta, or be featured as the main entrée with vegetables, rice, or potatoes to accompany it. 


Salmon is a very versatile fish that can be cooked plenty of ways depending on your taste and preference. Learning how to cook the best salmon isn't difficult. Here are a few of the most popular ways to handle this type of fish:

Baking: Baking salmon is pretty easy. All it requires is a greased baking pan; an oven set to 350 degrees; some butter and seasoning. Begin by seasoning your fillet with whatever mix of herbs you prefer, and then brush with melted butter. Cook in the oven for 10 minutes per pound or until the salmon flakes.


Pan Frying: Pan-frying makes a delicious meal, but it can be a bit tricky until you get the hang of it. Pour enough oil into the pan to cover half of the filet. Make sure the oil is very hot before dropping your salmon into it but be sure it is not so hot that it smokes. Next, rinse your fillet in water, and then dip in milk and season to taste. Plop into the hot oil and fry for about 4 minutes per side.

Broiling: This is another tasty way to prepare a great salmon steak, but be sure to keep the fillet about three inches from the heat and never put a salmon filet in a cold oven. Be sure to preheat the oven for at least 10 minutes before cooking. Dip your fillet in cold saltwater, and then lightly powder with flour, followed by a simple butter and seasonings baste. Broil until done turning once during the cooking process.


As you can see, learning how to cook the best salmon fillet ever is not as difficult as you may have first thought. The key to preparing a fantastic meal is mixing a good seasoning base and making sure that your heat source is very hot before you begin.


0

If you've ever tried this dish at a Red Lobster restaurant, then you clearly understand that some of life's most pleasurable offerings can really be simple pleasures. The Red Lobster Shrimp Scampi Recipe calls for simple ingredients. The method is also simple. But the results are mind-blowing!


Make your very own "copycat" Red Lobster Shrimp Scampi for a quiet, romantic evening with that special someone, an adventurous family feast, a potluck, or just for your own personal enjoyment. This recipe is great for any season, any occasion. It's not only simple, it's versatile!


Lobster Shrimp Scampi

Red Lobster Shrimp Scampi 


Ingredients:

1 cup white wine
1/2 cup unsalted butter (NEVER use margarine!)
1 pound medium, raw shrimp, peeled and deveined
3 tsp. raw, minced garlic
Four basic ingredients. Pretty simple so far, right?
Red Lobster Shrimp Scampi 

preparation:


Preheat oven to 350 degrees, Fahrenheit.

Combine all ingredients in a medium casserole dish.

Bake, uncovered for 6 to 7 minutes until shrimp is pink. Do NOT overcook!

Serve alongside a nice steak, an accompanying seafood entree, or alone with your favorite side dishes.

Enjoy!

And there you have it. Easy and absolutely delicious! As you can see, this recipe calls for a pound of shrimp. As the main course, this should feed 3 to 4 people, so alter the recipe according to individual situations and appetites.


I personally recommend a nice filet mignon or Maine lobster tail to accompany your shrimp scampi. As your sides, some grilled asparagus and garlic mashed potatoes are quite complimentary. Enjoy!

0

The first Japanese barbeque that I attended got me fascinated because it was quite different than what we have back home. We grilled a variety of meat, some seafoods, and vegetables but what got me surprised was seeing "yakisoba" (fried noodles) being prepared. I didn't know that noodles will go well with barbeque but it did. Usually, noodles are sold in packs that are good for two, three or for four people. During that barbeque, I ate a whole pack good for four people and that is how delicious it was.

We had two barbeque grills, one for grilling and one with a barbeque plate on top where we cooked vegetables and yakisoba. The ladies helped preparing the ingredients and the men did the cooking. One of the girls brought three types of yakisoba sauce at the barbeque. One is sweet, one is a bit sour and the last is a bit spicy but they all taste the same. The kids loved the sweet sauce, the sour sauce was popular with the ladies and the spicy sauce were popular among the men.

Yakisoba is a simple but tasty dish. The ingredients are not hard to find and preparation is easy. It can be prepared in minutes by anyone. Here is the recipe for yakisoba.


Yakisoba


Yakisoba Recipe


Ingredients:


- One pack of yakisoba (dry noodles)

- 250 grams of beef cut in thin strips

- Cooking oil

- One Carrot

- One Cabbage

- You can also add other vegetables, meat or seafoods of your choice, just cut them into bite-size pieces

- Half a cup of water

- Your choice of yakisoba sauce or tonkatsu sauce

- Peeled and crushed ginger (optional)


preparation:


- Start by peeling the vegetables and cut them into bite-size pieces. Wash them properly in water.

- In a frying pan, fry the beef and saute all the vegetables, but do not overcook.

- Add the noodles in the frying pan and add a half cup of water

- Water will evaporate, fry it for about four to five minutes or best to test the noodles by eating some.

- Add the yakisoba flavoring that came with the yakisoba package.

- Transfer the yakisoba to a plate, pour yakisoba sauce on top and it is ready to serve.

Some like to sprinkle katsuobushi on top of the yakisoba. Some like adding mayonnaise. Some like to add a few drops of lemon and some like it plain.


0

Source for information, news, and food,recipes. We're dedicated to providing you with the very best and latest news, with an emphasis on cuisines and cooking. Founded in 2019, redlobster-seafood has come a long way from its beginnings in facebook and Instagram pages. When I first started out, My passion for redlobster-seafood gave me the urge to start my own business. We hope you enjoy our products and services as much as we enjoy offering them to you. If you have any questions or comments, please don't hesitate to contact us. If you have any questions about cooking or you want to buy delicious food for your family and do not know the appropriate quality.